MIDI module for EHX POG2 Basic MIDI module for switching programs of Electro Harmonix POG2 guitar pedal

Měna
MIDI module for EHX POG2
Category: MIDI Modules
Price: 65.00 USD
Quantity discounts:
Quantity Price
2 63.70 USD
3 63.05 USD
4 62.40 USD
5 61.75 USD
10 58.50 USD
20 55.25 USD

Availability: temporarily unavailable

Automatic notification of the availabilityDo you want to be notified directly when the product is available? We will send you a report on this. Once the product is available, a message will be sent to you automatically and your e-mail will be deleted from our database. This registration does not commit you to buy this product.


Weight: 0,080 kg

Order code: MPR-EHX-POG2-MOD
 

Temporarily unavailable: we are manufacturing a new series of the modules.

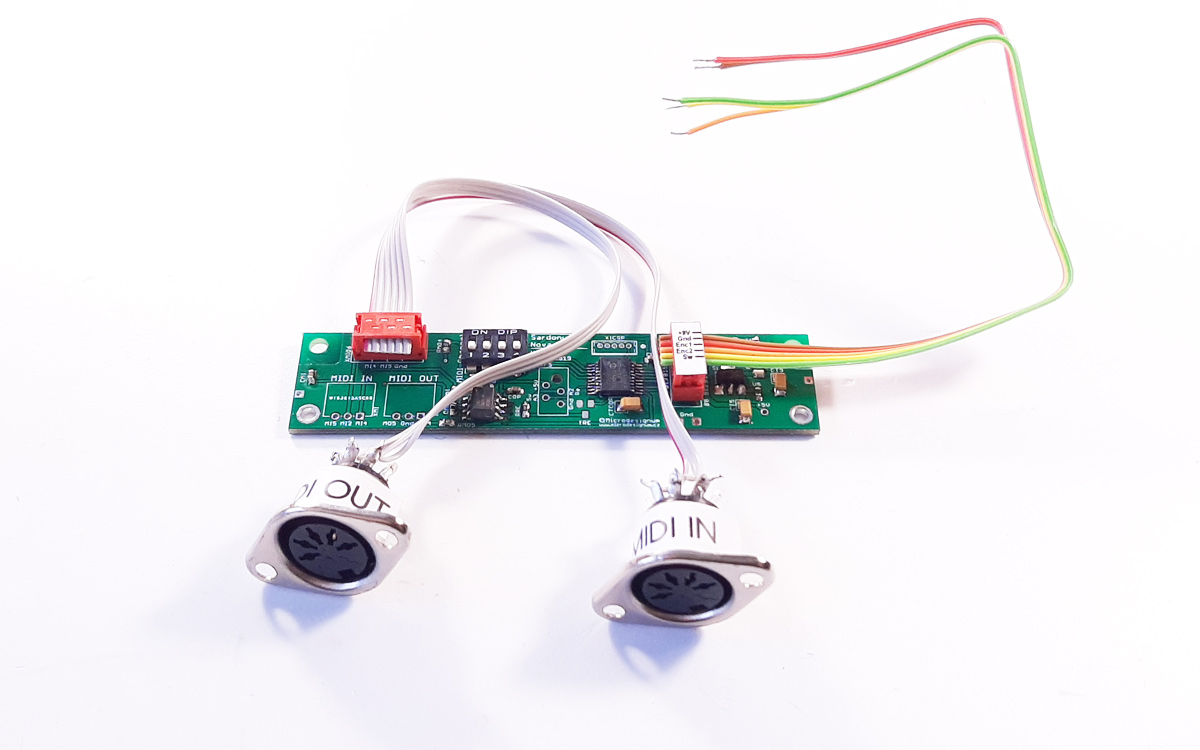
This small electronic kit facilitates controlling EHX POG2 using foot MIDI controller or from computer by DAW software.

MIDI module for EHX POG2 pedal

Programs switching

The module allows to switch programs 1-8 or off. This variant doesn't control Bypass function. It can be controlled with enhanced variant of this module: MIDI module for EHX POG2 with Bypass - 85.00 USD

How it works

Installation and control via MIDI from Shnobel Tone, US:

How to install the module

Parameters

Property Value
Target guitar effect: EHX POG2
Variant: module
Controled parameters: programs only
Catalog
Detailed product information:
Microdesignum.cz > Products > MIDI Modules > MIDI Control for Electro Harmonix POG2
 

Photogallery Photogallery

Photogallery How to install MIDI module into POG2: 1) Control cables

15.03.2014

Make POG2 MIDI controllable using Microdesignum MIDI module in 60 minutes

Number of photos in the gallery: 10

Purchase the MIDI electronic kit for POG2 in our eshop
Open the box
Open the box
POG2 is opened
POG2 is opened
Six soldering points
The new versions of POG2 module have one more conductor for LED sensing
Put more solder to the soldering points
Solder the six conductors
Solder 9VDC and GND conductors to the soldering points.
Solder encoder conductors to the soldering points: Enc1, Enc2 - rotation, Switch: push
Solder LED conductor near CN2A label (if you have the newer version of the module)
Photogallery How to install MIDI module into POG2: 3) MIDI connectors

01.03.2021

Number of photos in the gallery: 16

Self-adhesive labels
Self-adhesive label for MIDI IN
Self-adhesive label for MIDI OUT
Secure attachment
Secure attachment
Predrill the 3 holes by ø1.5 - 2 mm drill
Drill the ø3.2 mm holes (can be ø3- 3.5 mm)
Use a step drill
Use a step drill
Drill the ø16 mm hole
The ø16 mm hole is drilled
Peel off the sticker
Chamfer the ø3.2 holes
Optionally chamfer the ø16 holes
Affix the sticker with MIDI IN
Affix the sticker with MIDI OUT
Screw the MIDI IN connector to the side of the Guitar In Jack
Screw the MIDI OUT connector to the side of the Effect Out Jack
Photogallery How to install MIDI module into POG2: 4) Attach the module

01.03.2021

Number of photos in the gallery: 9

Attach the drilling template
Mark 2 holes on the bottom lid using the drilling template
Drill ø1.5 mm holes first
Then drill ø3.2 mm holes (can be ø3- 3.5 mm)
Screw the MIDI module to the bottom lid
Close the box
Close the box
Screw the lid
Screw the lid
Affix the sticker with description
Enjoy controlling POG2 with your MIDI footswitch controller
 
 
Question Question

Do you have any questions about this product?


MIDI Modules

Using our electronic MIDI modules, some guitar pedals can be controlled by Program Change or Control Change MIDI messages. The principle of operation is that the installed control MIDI module electronically simulates turning and pressing control knobs or encoders and replaces an activity which would have to be carried out during the guitar playing.

Install services

We also provide install services of the modules in our location in the Czech Republic (Central Europe). We also have our partners in the USA, Canada, Australia and France that are able to provide the install services for you. » See the list of our partners.

 
Nahoru